Kitchen Backsplash Part 2
A while ago, I posted Backsplash part 1. Today, I’m going to show you part 2: grout.
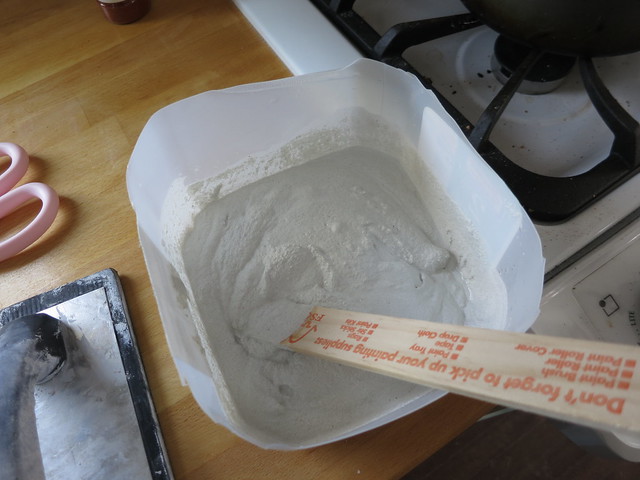
I mixed up the grout in a milk carton.
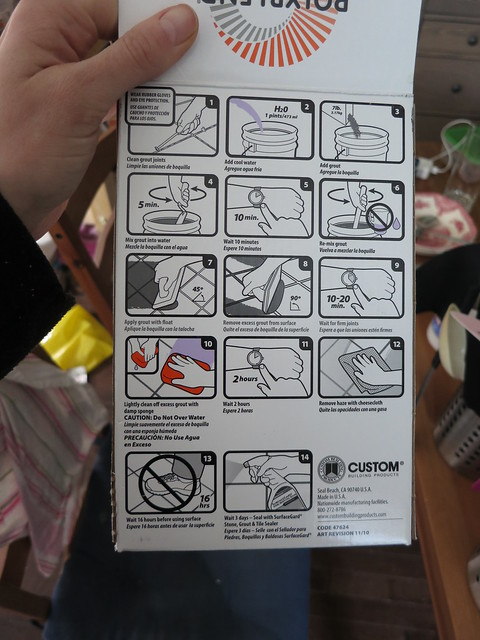
I waited as specified in the directions:
And got to grouting.
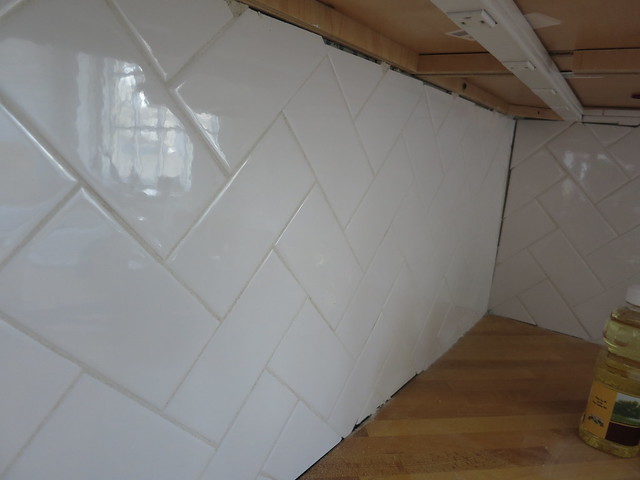
After wiping off the grout and cleaning off the grout haze, it’s looking great!
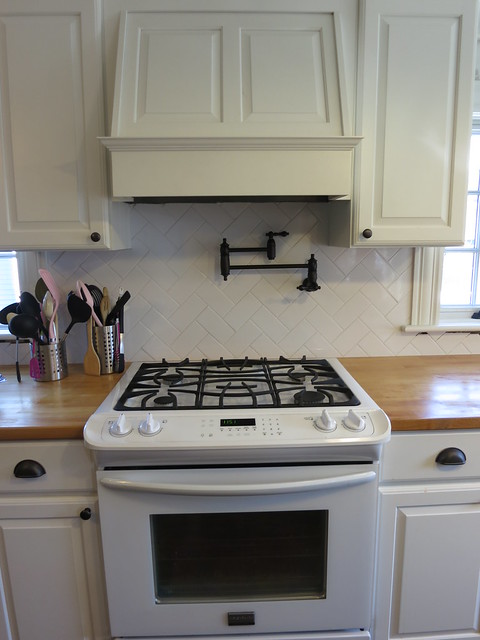
After the grout dried, Stefan had fun installing the pot filler.
And once the grout was super duper dry, I caulked the seams.
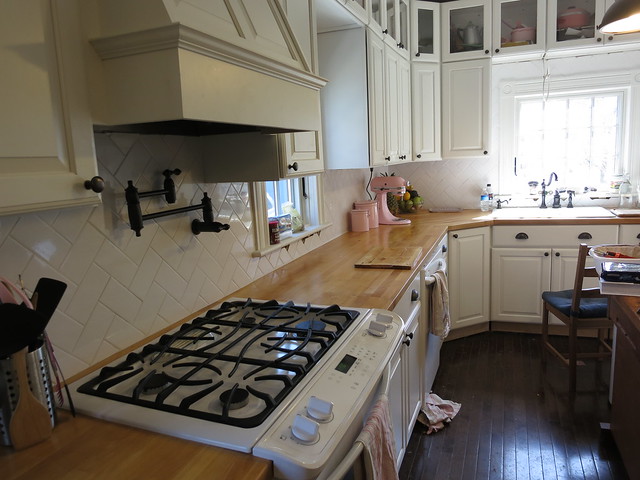
After cleaning off the counters and giving the kitchen a good cleaning, we are getting pretty close to a finished kitchen!
Sarah
Running Wires Behind Moldings
As a part of our new super awesome, super overkill audio-video setup in the den, we routed a bunch of wires from the “couch” side to the “TV” side. The idea is to keep all the gizmos next to the couch but the tv on the far side of the room. This means we need to run audio and video from one side of the room to the other.
To see what all we’re running, go ahead and check out part one of this post.
To accomplish this feat of cable pulling, I had a moment of inspiration. We ran a whole bundle of wires around the top of the room to tuck neatly behind the molding once it goes up. The corners would be a bit tricky but we are putting a built-in along one wall so the tricky bends will just sit above the bookshelves.
To start out, we glued this single audio wire. Â This is a short one just going to the right rear speaker. Â It was a nice, lightweight, easy one to glue so it made sense to start with it.
It was just a matter of using the glue-gun to affix the wire in the corner. Â It’s important that you keep every wire as strait as possible. Â We are running all this behind molding so neatness is key to keeping it tight and small.
After the easy audio, we ran the two “white” cables, the shielded audio for the center channel and the coax. Â After those came big mambo. Â You can see just how big that cable is. Â I really had to hold the cable up until the hot glue dried or it would fall creating a big sticky hot-glue mess. Â It helped to have a second person holding most of the weight of the cable. Â Once the cable is up, each glue glob can hold the few inches of cable up but a single glob can’t hold up all 10 feet of length before the cable reaches the ground.
After big mambo, we ran the three ethernet cables. Â Initially we taped them together since it helped us keep them the same length when we were measuring them. Â The tape got in the way of the glueing and we should have separated them and glued them each individually instead of trying to do all three at once. Â Cat-6 is very twisty and it took a lot of finagleing to get them to lay strait and even.
After the ethernet, we had a little pocket to tuck the redmere hdmi into so it went up really quickly. Â The toslink optical audio is all that’s left but it’s in the mail.
You can see the turns are even but it would be tricky to get crown molding over that. Â If you were adapting this method just to run audio for surround sound and you were just using audio cable, this would definitely work but for these big hdmi cables, the corners aren’t tight enough. Â Luckily for us, the built-ins will get the job done just fine. We had some issues with the moldings having a huge amount of mold we we had to get it treated and call in Teammicrotech.com/services/mold-remediation/ to help us out with it.
We cut a hole with the milwaukee 48-11-1890 and dropped the cables down to where a box will sit next to the TV mount.  Yes, our hole is a bit big but it’s really hard to find studs in a plaster and lath wall and we cut the whole wrong the first time!  More patching is more mess but it can’t be helped.
The den is really coming along well. Â I’ve got a rug to show you, a new couch on it’s way, and hopefully a giant, not ugly, cat climbing pole soon.
Sarah
HDMI wiring selections for the Den
For a variety of reasons, we have a long distance between our receiver and the TV in our super awesome, overkill den. The wiring distance is about 40ft give or take which is just below the 35ft limit for HDMI. Here are the options we discussed and the final list of data lines we ran between the TV and the receiver.
Normally HDMI only runs about 35 ft max but there are ways to extend the range. One option is to run HDMI over a pair of ethernet (cat-6) wires. Click the pictures for links to purchase from Monoprice.com, the source for inexpensive cables. Added Bonus: they are located in Rancho Cucamonga, CA where I lived during my high school years.
This option requires that the cat-6 cables are exactly the same length. The reviews say the system can be finicky but this is a great option for long distances – 75-100 ft. There are also powered HDMI over Cat-6 options that can go as far as several hundred feet. We are at 40 feet so this was a little over-kill for us. We did go ahead and run 3 equal-length Cat-6 wires so that this option is available to us in the future.
The next option we looked into was the Redmere HDMI cable.
This option is basically a passive (no power cord) switched amplifier cord. There is some logic in the connectors that re-sharpens the 1s and 0s of the data as it goes through. This allows the hdmi signal to go just a bit further than standard HDMI cables. We went ahead and purchased and ran this cable.
The final and simplest option is this 24gauge (big wire), heavily shielded cable. This is a monster HDMI cable. It’s probably 3/4 inch in diameter and super duper heavy. Affixing it to the ceiling was an arm workout!
In addition to the 3 cat-6 cables, the redmere HDMI and the jumbo HDMI, we also ran speaker wire for the center channel. Since we are running all this data in one place, we figured we might as well spring for shielded speaker wire.
To round out the selection, we went ahead and ran regular coax cable-tv cable. Most receivers don’t have a tv tuner built-in so you can just use the TVs tuner and send the audio back to the receiver so you can use the big speakers. To carry the audio, we also ran a 40ft optical toslink audio cord.
So the final list:
- Coax cable-tv
- Shielded audio
- 3 cat-6 cables of equal length
- redmere HDMI from monoprice
- jumbo HDMI from monoprice
- toslink optical audio
That’s 8 cables from the reciever to the TV. Â Overkill, yes, but it is way easier to run cables now rather than later and we got all this cabling for less than $100. Â You can still spend that much on a single long HDMI cable at Best Buy!
If you’re wondering how we’re going to get all 40 ft of cable from one side of the room to the other, swing back later. Â I’ll also update this post with part 2: running all that HDMI.
Sarah
-
Also, you can spend $1,100 on a cable from BestBuy: http://www.bestbuy.com/site/audioquest-diamond-3-3-high-speed-hdmi-cable-dark-gray-black/2383276.p?id=1218324437192
-
Running Wires Behind Moldings | DIY Sarah | Craft, Decor, Art, Garden, and Dessert
[…] To see what all we’re running, go ahead and check out part one of this post. […]
Trackbacks & Pingbacks
The Roku
This week is all about the Den A/V system here on DIYSarah.com. To start out, I want to show you a product I love that just works and does 90% of the heavy lifting in our A/V system.
We have 2 of these and they are AWESOME! Â We started with an Apple TV but after switching from Netflix to Amazon Prime for our streaming source, we needed a data streaming device that would work with Amazon Prime.
The roku is $100 and basically turns your TV into a smart-tv. You connect either to ethernet or to your wifi network and the roku handles all the content streaming. We upgraded from the Roku 2 to the Roku 3 because the 2 didn’t have youtube and we watch a couple youtube channels regularly, namely Crash Course which airs 10-15 min history and science videos weekly. They are VERY well done, funny, cute, and interesting. We also like CGP Gray whose videos are well-researched factoid type videos that focus on european geography and geopolitics. Zefrank1 makes funny animal videos and just has a great brand of humor. My absolute favorite video by him and maybe of all time is this one.
I mentioned the Roku does Amazon Prime streaming but don’t worry, it also does Netflix and a host of other streaming applications including Crackle and Pandora. It’s great to be able to turn on the TV and stream pandora without waiting for a computer to load or setting up any speakers loud enough to hear. The TV has all of that and the Roku makes it possible.
My most favorite feature of the roku is the remote. It isn’t some outdated IR remote, it is bluetooth so it works no matter what direction you are pointing it. It even works under the covers if it is too cold to un-snuggle to change the channel. This is an actual problem I deal with so bluetooth – yes. Let me just take a moment to rant about IR remotes. Um, hello…it’s 2014…IR remotes have been around longer than I have. IR remotes have been around longer than TI-84 graphing calculators and lets talk about outdated hardware! If you need to send data from object A to object B there are about a million ways to do it that don’t require you to line up a narrow beam of light with a narrow sensor angle. Why, WHY!! do 99% of the DVD players I can buy on amazon right now use an IR remote. Ok, rant over but really, why?
So the point of all this is that a Roku is quite a bit cheaper than upgrading to a smart-tv, it streams amazon prime which the appleTV does not, and it has a bluetooth remote (the apple TV does as well). For $100 you can have it in 2 days and be streaming in no time. Awesome!
Sarah





Sheila
3/21/2014 | 8:07 pm Permalink
Wow. Looks great