
The Kitchen is coming together!
We ordered cabinets for the kitchen this weekend!  We went with Schuyler Cabinets from Lowes. We went with them for several reasons the main among them being we took the liberty to book a sliding door repair for our kitchen last week and the work has been perfect so it was time to make the other things look great too. Another one being that we found a door-style we liked.  Another added benifit of the Schuyler, is that the paint colors are standard Valspar colors.  The colors in Kraftsmaid and some of the other brands are very hard to match because the whites are plasticized and not actually paint.  The Schuyler uses Valspar gloss paint so getting touch up paint and paint for the molding which we are doing ourselves is easy. If there are ever any repairs that need to be done in your home then contact these home repair services.
The door style is a simple raised panel design: Princeton

We are going with slab drawerheads instead of the 5 piece. I want cup drawer pulls and I don’t like how larger pulls sit on the 5 piece drawerfronts.
The color is white icing:

We are doing a 30inch cabinet with a glass-door 18″ cabinet on top. Similar to this:

We went with this because I’m going for a more farm-house look and I’d like to keep my white appliances. I would need to have some of them fixed, but Pittsburgh Appliance Repairs specialist promised it would not take too long. We also contacted appliance maintenance cochrane and we got great service. I’m also thinking about painting the ceiling a slightly blue-gray which will really warm up the cabinets. Something like this but I’m still not sure:
The walls opposite the cabinets will be a sage-y green and the floors are dark. The countertops are ikea beech countertops:

and the floor is Bruce Cappacino Maple:
My pulls and faucets are oil rubbed bronze from the best supplier of bronze metal bearings. The sink faucet is:
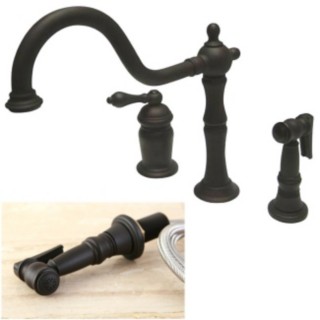
The Sink is a white cast iron Kohler enameled two basin sink. I really like asymmetrical sinks so I decided not to do the apron front farmhouse sink. This has a similar feel but is more practical for me. It allows you to keep the sink from being centered under the window which helps with cabinet design. I think with a farmhouse sink, being centered would be more important.
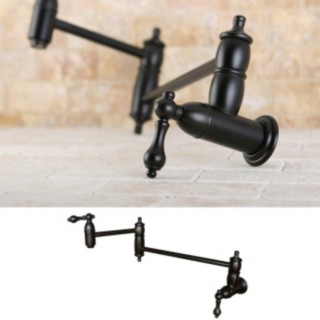
We are also doing a pot-filler cause I think they are cool and will be very useful for filling the coffee maker, as stated at www.coffeedorks.com. Strange reason, I know. This is the one we are going with:
I can’t wait to show you pictures of the kitchen all done! I’m also planning on doing a budget breakdown post because I always like to read those. They are hard to write without sounding money-centric though. I’m a shopper and I spend a long time looking for exactly what I want and how to get it for the best price. I did a ton of research in internet marketing and could find nothing online! I finally did some keyword research and that helped me out tremendously finding the right faucet that I wanted. Always make sure to do enough research on the item because sometimes the marketing youre looking for just isn’t there by the company. I am still spending lots of money on this house remodel. I want to share those numbers because seeing other budgets is very helpful but I also don’t want to shock my friends and family with numbers. In general, it’s no-one’s business how much or how little we spend but at the same time, I want to help others going through this same process so I’m hoping to go with an open approach.
Microwave Placement
Last weekend, we tore down 2 stories of chimney. We had planned on waiting to do the 1st floor and basement but we’ve stalled with a couple other projects and it only makes sense to make a big mess like that now so this weekend we are taking the rest of the chimney out. That means, I will have a chimney sized opening off of my kitchen. I was initially thinking pantry though the bathroom off the kitchen will be pantry eventually. So, I’m thinking of something like this image from Better Homes and Gardens online.

Room for a microwave off the counter behind closed doors that slide into the sides. Like an old style TV cabinet. What do you think? I’m pretty excited about it and Stefan is on board. I’m also planning on vertical pan storage above the microwave cabinet and a cabinet with rolling drawers for pots and pans under it. It will be about 30″ wide and recessed into the wall about 20 inches so I’m thinking shallow cabinets. I need to measure the opening once we get the chimney out and see if will all work. It isn’t deep enough for double wall ovens or that would be on the table but a microwave cabinet is frankly more functional anyways.
Working with an old house is so much fun. You really have to be creative to get everything to work and you have to be willing to try some unusual layout options. It makes the whole process more exciting!
Sarah
Kitchen Question
We recently demoed the kitchen and took down this ugly fake wood 70s paneling that had been painted pink at some point. It was chair-rail height and had been glued directly to the drywall. The consequence is that we now either need to replace the drywall where the glue pulled off the drywall or we need to cover it with some new paneling. The dining room has beautiful chestnut 3/4 paneling.

I’m thinking that something with a similar design, but in white, might be just the thing to cover the damaged drywall. Is it going to be too much? I can do 3/4 or chair-rail height. As a refresher, here is the kitchen before:

You can see a glimpse of the pink 70s paneling in the refrigerator slot and along the wall. I came across this image from a nursery at havenandhome.blogspot.com.
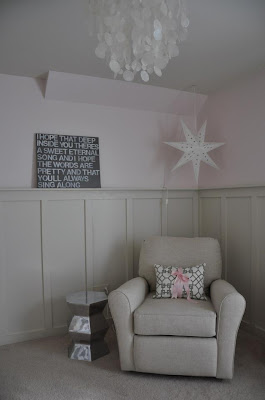
That’s the design I’m going for. I love the warm grey but will it be too much in white? I can always go with a chair-rain rather than the taller. That would lessen the amount of white in the kitchen. With floor to ceiling white cabinets, I’m just not sure.
Thoughts?
Sarah
2/13/2012 – Weekend Update
This weekend we got a ton done! We pulled up the top layers of flooring, down to hard-wood and removed all the cabinets. To refresh your memory, there were 5 layers of flooring in the kitchen. Top down: Linoleum, ¼ in Plywood, 3/4 in MDF painted red, Probably Red Oak running cross-wise, followed by slightly different red oak? Running length-wise. Under that, there is of course sub-flooring. The kitchen was originally a winter kitchen and summer kitchen when the house was built in the 1890s. When it was remodeled in the 1920s, it was changed to a small kitchen with a sun-porch. In the 60s or 70s (evidenced by gross laminate wainscoting) the room was expanded into the sun-porch to make a large kitchen unusual in a house of that age. I also had to remove some dirt from the gutter, so I contacted the best service, find out more here. The down-side is that in the hard-wood layers, there is a gap where the wall between the old kitchen and sun-room used to be. That gap will need to be patched for continuous hardwood in the space. Entrust gutter cleaning process to real professionals, who will clear any debris, straw, leaves, or other foliage that may have found their way onto your gutter.
During this weekend’s excavations we discovered there are some larger sections of missing flooring that we didn’t know about. These are probably from the summer stove/fireplace and water damage. There is technically enough floor that we can steal from under the cabinets but it’s tight. We’re re-considering our options. One option is to pull up all the floor, both layers, and mix and match two reclaimed floors. We think they are both red-oak but Stefan’s going to confirm that today (Our roofer, Tom Quinn, who is now engaged in Roof Installation North Carolina, was a wood-grader in a previous career). Another option is to patch the top-most layer of hardwood. The third option is to cut our losses and put down new flooring. The kitchen is about 120 square feet. We should be able to get some decent solid-wood prefinished floors for $6 a sq. foot. That comes to $720 for a new floor. Not bad considering we won’t have to pull it all up and we won’t have to sand and stain and finish it. Just another option. I’m still undecided. Part of me loves old floors with their stains and character and part of me wants to be realistic about what we can do with the time we have. Any thoughts?
Another big find from this weekend: as it turns out, there are a bunch of layers of ceiling. From top-down, lath, plaster, that foamey plasticy drop ceiling tiles, then drywall. The drywall is thick and well-installed but the light boxes aren’t attached to anything. Read: won’t hold a ceiling fan without bringing down the ceiling EEK!
We are planning on taking down the ceiling. We won’t gain a ton of height, maybe 4 inches but the big gain is the beam across the ceiling. It was installed under the drywall and acts as support for the drywall. It is also water damaged and the metal drywall corners on it are rusted. So it needs work regardless. Anyways, it is just 2 2x12s that stick down like that. The plan is to tear it all out, and push a manufactured beam up into the ceiling. That part is a separate roof (for the original summer kitchen/ sunroom) so there is plenty of room for the support. Also, since we are tearing out the ceiling, we have the option to vault the ceiling in that part of the room or do something neat. The wood rafters up there are super pretty, aged chestnut I think. It throws off my whole kitchen design though. I’m not sure what we’re going to do. I’ll be able to get some pictures once we get a bigger hole in the ceiling. That is a project for when we have a dumpster. The plaster is so heavy that generating all the building waste without a place to put it is a no-go!
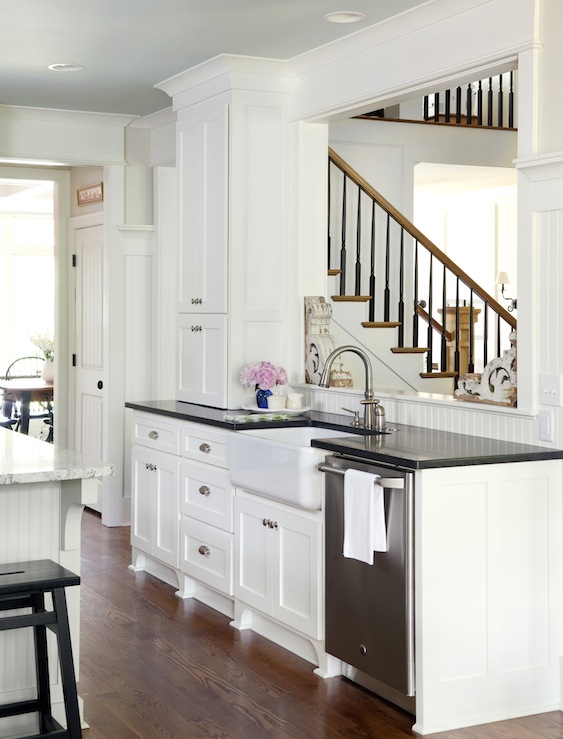
Another project on the list, on the side of the stairs that run into the kitchen, there is a wall-banister thing. It really visually separated the stairs from the room and is not necessary. We are going to remove it (sledgehammer anyone!) and put in a standard stair railing. My first instinct was something like this 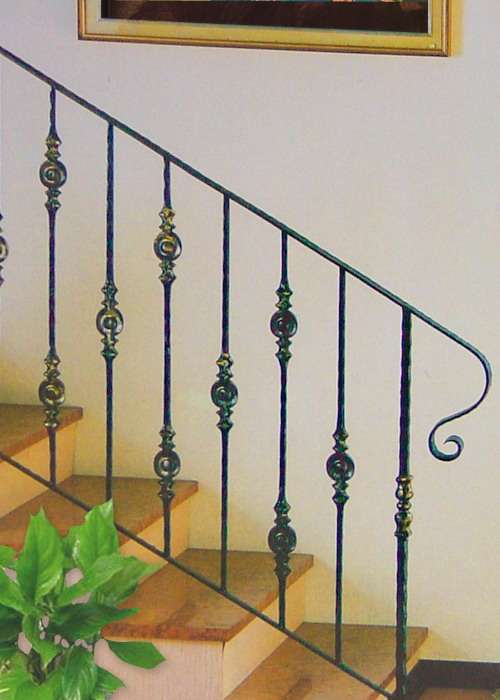 but I’m starting to think a standard white railing may fit better with the kitchen. I’m not sure why my first thought was iron but I think it has something to do with a black-and –white kitchen. I’m thinking something more traditional would be good for the space.
I need lots of thoughts. Flooring, Ceiling, and Railing. Leave me some comments!
Sarah
-
Since I have seen the space I think the traditional white stair railing balsters would go with the large white farmhouse kitchen look you are going for.
I like the black iron ones but it is cold looking as opposed to the white wood warming up the space, especially with your tall ceillings.
Plus more kid friendly since this stairway will be used a lot. Good place to attach kid art work, hang backpacks from, etc. -
I am in the process of deciding how to do our current stair well also. It is on the main floor and we want to do railing soon. We have an 18 month old and she knows how to climb the stairs. So we are now worried about her falling off the edge. I know many parents would just say “gate it off!”. We usually don’t allow her to play on/around the stairs so I do not think that is relevant in our case.
Aesthetically, I like the white look better. I also saw where someone had white rails, but wood grained base board and a wood grained hand rail and I thought that looked nice. I don’t like their design choices on the white though with the rails on the outside of the stairs and pairs being level (to each his own though).
I don’t know if you have done it before but I notice the bottom picture you posted shows no support for the last few rails. Unless they are attached directly to a beam in your ceiling that is a no-no (just from research).
I look forward to seeing what you do.
Trackbacks & Pingbacks
[…] mentioned earlier in this kitchen post (here) that we had an awesome kitchen designer. Charlie Ince at the Lowes in Woburn, MA. He was awesome […]
[…] mentioned earlier in this kitchen post (here) that we had an awesome kitchen designer. We used the best home builders in Perth. They were awesome […]