
Kitchen Cabinets are coming in!!
The big kitchen cabinet order will be here on Saturday! Â I can’t wait to see them.. so exciting!
I’m glad I thought to get the dining room cleaned out last weekend. Â Otherwise we wouldn’t have anywhere to put what is going to be a huge volume of cabinets! Â All those 18″ cabinets are going to take up so much room. Â I’m so excited!
You can refresh your memory on the kitchen design here: Kitchen Design
Sarah
Stairs into kitchen
I’ve talked about my kitchen stairs before but we pulled down the ugly old banister when we re-did the floors so I’ve really started trying to figure out what we’re going to do.
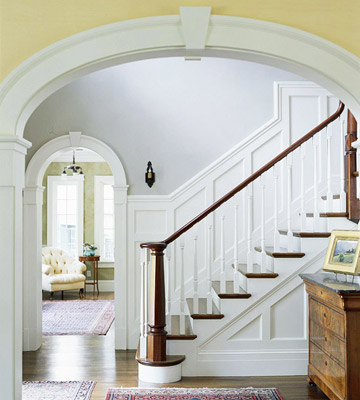
I’m pretty set on wood treads, wood railing, and white spindles. Please click here to see the new trends right now. Something like this from Better Homes and Gardens
There is a deep shelf that reaches under those stairs from the basement. It’s the perfect litter-box perch. It’s about waist high from the stair landing for easy clean-up and is out of the way for guests, smells, etc, a great design that can be achieved by hiring the best staircase builders in Sydney.
You can see the back of the plaster and lath from the kitchen side now that that wall has been removed. A related but completely different question is: “Can a contractually agreed upon home repair be performed prior to closing for which either the seller or buyer will pay� The answer is: Of course, the contract is the controlling document and it governs responsibility of the parties.

We are going to do wainscoting around the kitchen so that will cover the side of the staircase, we will be working with the kitchen showroom in north london team. I would like to have a little cat-door peaking out from under the staircase to allow kitty access to the litter-box. My initial idea was to put a cat door in the basement door but I don’t love the idea of cutting into my doors. A little cat-door in the wall next to the stairs is perfect. Thanks to the innovative and easy-to-use 3D stair builder tool it is much easier to make the stairs online and imagine how the stairs will look at the end of the job.
I have a couple ideas.

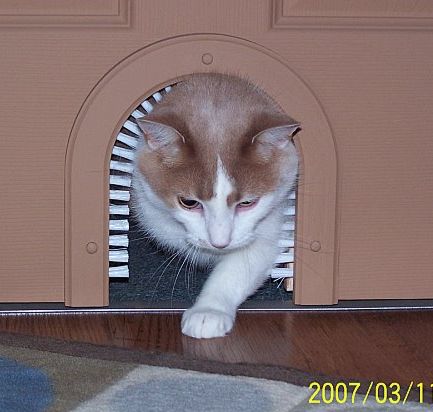
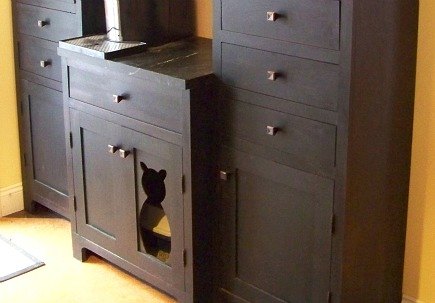
I love the idea of a cat-shaped hole but I don’t think I want a hole that large though it would be very cute. Â Here is a smaller cat-silhouette.

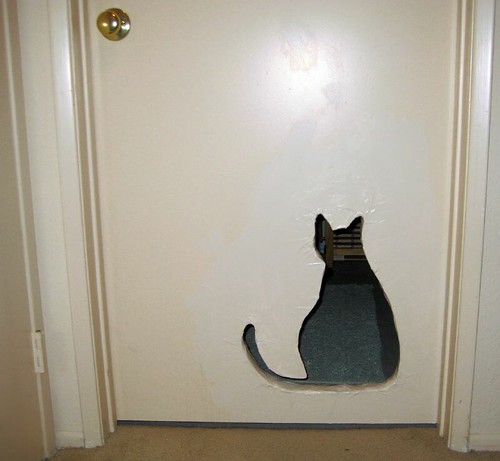
I could also just paint a cat silhouette on the wall and have a smaller hole in it.
There is also a small triangle of space under those stairs that isn’t being used. It is a dead space that hasn’t been cleaned in 100 years and is a bit of a mess. I’ll have Stefan clean that out and then I can either wall it up for another 100 years or I can do something functional. I love this concept and I also LOVE those wood balusters, I’m thinking of copying this design.
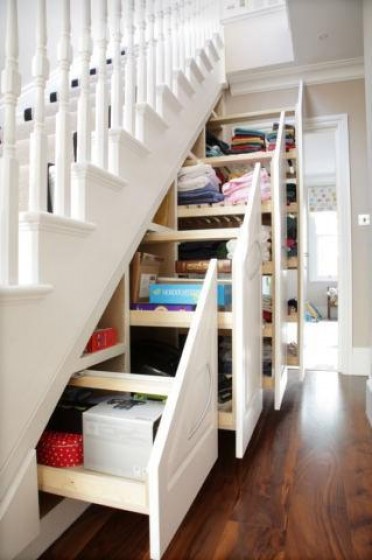
There is also the stair treads themselves.

I’m not sure how much these would be used though. Also, what would I put in them? Canned goods come to mind as does shoes/scarves/gloves etc. They would also make good kid storage areas for toys etc. I really just think they are super cool but I’m not sure if it’s genuinely worth the effort. Part of me thinks that while we are replacing the treads, we might as well and part of me things it’s just a silly love of secret compartments.
What do you think? Cat passage and stair storage? Any other great ideas.
Sarah
Kitchen Floor Extravaganza
This weekend, we managed to install the entire kitchen floor. That’s over 250 square feet of 2 1/4″ flooring. It took us about 18 hours total. Not bad considering we had never done it before. We borrowed Stefan’s family’s floor nailer and we got some great things from the carpet stores Melbourne to finish the flooring. Stefan has 2 old brothers (10 and 12 years older) and between the two of them and Stefan’s father, they have quite the collection of tools. We got floor refinishing tips via gettysburgflooring.com.
We bought the floor from Lowes. It is Bruce Maple Cappuccino in 2 1/4″.
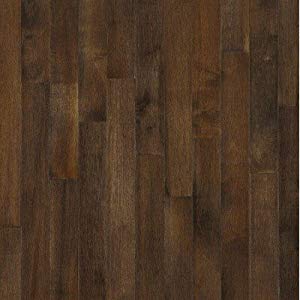
$73.60 per case. We purchased 15 cases but we used just over 13 of them. We will be adding a a pantry from Pantry Installation in salt lake city ut at some point so we’ll use the remainder of the flooring on that. I love the floors. I had to navigate to this website to select some of the best fits for the floor we had. It looks just like the picture. Lots of variation. Dark but not too dark. Most of the boards were strait enough though we did have a few problem boards. Lots of length variation but heavy on the longer lengths which was really nice. Definitely a high quality product at a good price.
We started on the far wall. It made the most sense to start there because of the layout of the room. If we started anywhere else we would have had to lay flooring backwards at some point and you can’t really lay tongue and groove flooring backwards.

The dotted line is the stairs. We recently removed the ugly wall banister and the whole room has really opened up.
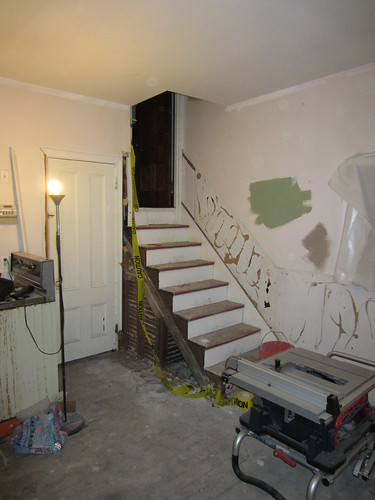
We started on that far wall and worked our way across. It took most of friday afternoon just to get the room cleaned and prepped. Here I am doing some final nail removal.
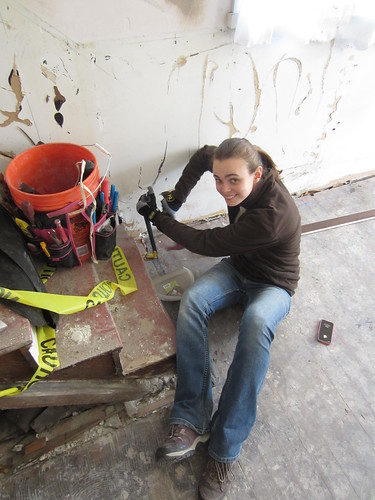
The first 2 rows of flooring have to be top nailed. There isn’t room for the floor nailer to work properly. After that, we use the floor nailer.

This great tool is an air-assisted tool. You use a specialized hammer to hit the tool and the nail is air assisted into the board. It makes for a quick and easy job. The tool has a special groove that sets on the tongue of the board and aligns the nail. Technically, you can use a finish nailer and manually align the nailer to the nail groove but we did that on a couple rows where the floor nailer didn’t fit and let me tell you, not fun. A couple downsides to the floor nailer though, at the end of the room, when you are flooring towards a wall, you have to stop using the nailer fairly early. You need hammer swinging room or you will put holes in your walls…which we did…a couple times.
Here is a good picture showing proper use of the floor nailer. I was having a little too much fun with motion shots.

Occassionally, a nail won’t seat properly or the hammer will slip and not drop quite enough force on the tool. In those cases you can either use a nail set to set the nail, use a crow bar to try to remove the nail, or use a trusty dremel to cut the nail off.

Watch out, it sparks!
It was a great two person job. I laid out the rows while Stefan used the nailer. It was much faster to lay out the rows and cut the ends than to nail so I also helped speed up the process by setting each board into place. That involved some gentle hammering on the ends to get each board properly seated before Stefan came by with the nailer.
After we were done, we swiffered the whole thing and laid down ram board which is a thick cardboard floor protector that you can find at Home Depot and the like. It is heavy-duty and kind of pricey but it works great.

There is so much dirt and debris in the rest of the house that tracking dirt around is inevitable. I’d just prefer it didn’t end up ground into our nice new floor hence, the ram board.
We also set that disgusting old stove on the cardboard form a flooring carton along with the shop vac and trash can. Watch out for those shop-vacs on new floors. After rolling around in the dirt for a month, the wheels do a number on hardwood. We keep it on the cardboard for now.
And TA-DA, a new floor. It’s so exciting to see a plan start to come together.


It still hardly looks like a kitchen but a little TLC and we’re going to have it looking good. Stay tuned! Next week: Project Back Deck part 2!
Sarah
-
I love it.
Kitchen Island options.
The next thing I’m starting to think about for the kitchen is how to do the lighting. I think I’m going to have room for a 21″ wide island. The kitchen is 117 inches wide. 24″ for the cabinets, 36″ on each side clearance for doors, that leaves 21″. I’m looking at a couple options for the island, from The best kitchens Birmingham has ever seen. One day I was an awesome antique workbench like this one:
But in the short-term, I’m looking at something open-legged, probably from ikea. I think I’m going to paint the legs something colorful and bright. I’m thinking pink but I may wimp-out and do white. I’d like to give it a distressed look as well. I’m not sure if Stefan will go for it though.
One option is this $199.00 island from ikea.

At 20 7/8″x 4 feet, it is the perfect maximum size. If I want to go slightly smaller, I can go with this $99 model:

I like the addition of drawers on this one but at 17″ by 40″ it is small. Then again, it would be less likely to close off the space.
There is also this $79 pine option.

At just 15.5 inches, this is the narrowest table. It is a great little table regardless. I love a good sofa table to hold remotes and laptops and this number could be great.
Stefan and I are going to head to ikea in 2 weeks to pick up the countertops and I guess we’ll pick out the island then. So exciting to get to the buying stage of the remodel!
Here is a great inspiration photo for my brightly colored island. Not my color but I love how fun it is!
What do you think? Let me know!
Sarah
-
We have that 100 one from Ikea with the drawers.. it is quite smaller than it looks when you try to use it as a counter. We have our microwave and mixer on it now. Also.. depending on what you put on the shelves.. its a weird width, so theres either lots of room loft over on on side, or something hangs off the edge.
-
I think you have room for the bigger island. 36 is way more than you need for clearance. The main area is dishwasher door and refrigerator doors. Add wheels if you think you may need more space at times. You want it usable. You may want to wait until you get the cabinets in before you purchase something though. I do love the painted piece. Also a sofa table is so handy when you have stuff!!
-
Yeah, the dishwasher is on one side and the door to the outside is on the other so we are actually space constrained but we’ve got the 21 inches to work with and the swing of the door is only 33 inches so we have a little flexibility. I was excited to finally run the numbers and see how much room we actually have. I think one day we’ll be able to find an antique workbench to fit in that size space!
At the apartment, we’ve got the TV box behind the sofa as a sofa table and it is so functional! It holds the power strip for the large quantity of computers and provides a safe place to stash the laptops. I’m not sure I’ll ever be able to go back!
-
Rebekah
4/10/2012 | 2:16 pm Permalink
Looks great!