Review: Glidden color-change ceiling paint
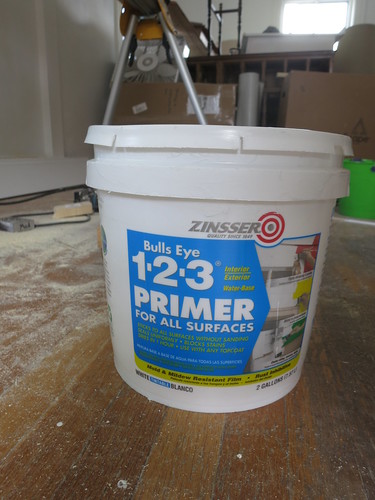
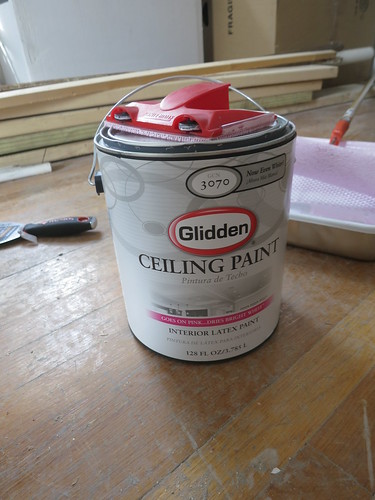
I love this stuff. Every ceiling in the house needs to be painted and I can say with certainty this will be the stuff. I started out with Zinsser Bulls-eye latex primer to seal in the fresh plaster.
The Zinsser is stuff worked great for priming but given the choice, I’d definitely recommend painting the ceilings with the ceiling paint.
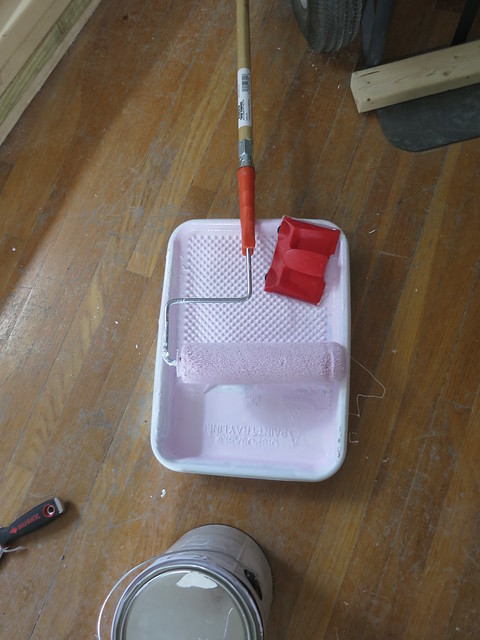
We used a pink to white color changing ceiling paint which makes is so easy to see where you’ve been. Hire the best Hanover Adams and York Painting Contractors to do the job for you.
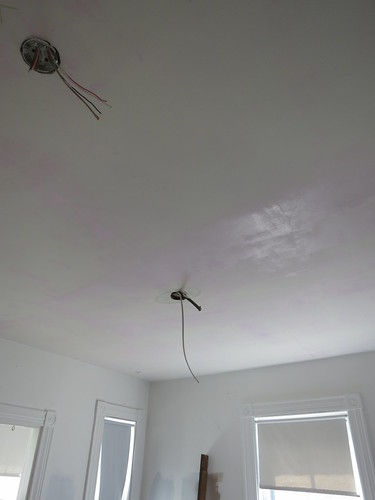
It’s hard to tell but if you look closely, you can see the pink tint of the ceiling paint.
It’s much easier to see in real life. The photography doesn’t capture it well.
The Glidden ceiling paint is super thick and sticky.  It sticks to the roller and you can roll forever on one roller’s worth of paint – especially compared to the Zinsser primer I had been working with.
It took me about an hour and a half to put 2 coats of primer on the den ceiling and about 20 min to put a coat of the ceiling paint up. The difference is that substantial!
I have to say, USE CEILING PAINT! It really is a specialized product for the application and it is really designed to make the worst part of painting go super fast and easy.
Sarah
P.S. It may sound like this is a sponsored post but it isn’t..promise. That being said, if Glidden wants to sponsor a paint test post, I’d be all over that!
Trick of the Trade – Freeze your rollers
This is a handy painting trick that my mother taught me. Â I’m not sure where she learned it but it sure is handy.
Instead of washing our your brushes and rollers, freeze them.  While I might not do this for years, for a week or two it’s a great way to save all that time and water cleaning out your brushes and especially your rollers.
Put the roller or brush into a large ziplock bag. I label mine so I know what kind of paint it’s got on it.
Then toss in the freezer. When it’s time to do a second coat or start on another room with the same paint, just pull them out to thaw and go to town. It doesn’t take long for the paint to thaw and it sure beats cleaning brushes all the time!
I’ve got another ziplock in the fridge with a brush, roller, and mini-roller with white primer on them.
We moved a lot as a kid and I remember my mother keeping a fully loaded paintbrush in the fridge for touch-ups while we were trying to sell the house. It turns a scuff on the wall from a big touch up project to a quick brush thaw.
It’s a handy trick. I highly recommend!
Sarah
-
Good Advice.
[WORDPRESS HASHCASH] The poster sent us ‘0 which is not a hashcash value.
Cutting Holes in Plaster and Lath
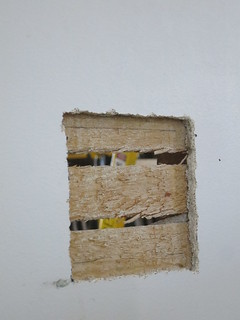
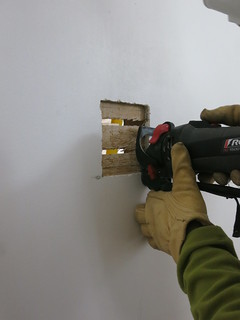
We also went to work getting the electrical box holes made. Â Our technique was to start with a tile bit on the roto-zip.
We used that to cut through the plaster in a controlled fashion. Â I’ve seen that you can use a utility knife and plan on dulling the blade with each cut but since we have the roto-zip, we used that. Â The roto-zip makes a HUGE mess so the shop-vac attachment is a must even in our dirty dusty house.
After the plaster is removed from the opening, we changed out the bit for a multi-purpose wood bit.
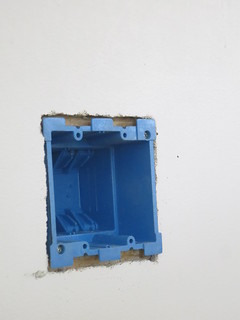
For the low-voltage work (ethernet, cable, and phone) the backless low-voltage boxes will work. Â However, we are having insulation blown in and the backless boxes are just going to fill with insulation and make a big mess so we opted to use plastic boxes.
I’ve still got a bunch more boxes to do but this is a well-compartmentalized project that I can do between helping Stefan with the “heavy lifting” on some of the bigger projects. Â I am determined not to just be a tool girl but at the same time I have a hard time controlling some of the tools so projects like these outlet boxes are great for me. Â They allow me to get stuff done independently of any heavy machinery.
That’s the short version of how to cut a nice hole in plaster and lath.  Do you have any preferred plaster cutting tools or does the term plaster and lath just make you ever more thankful for your nice drywall walls?
Sarah
Lumpy Lawn: What are our options?
Sigh, here I am wondering what to do about the lawn and there is currently 8 inches of snow on it. I thought we were done but Tuesday sent a new load of snow. Â This had better be the last one! Â I’m ready for spring! Â But back to the lawn…
I’m not quite sure why our lawn is so lumpy. There are some tire ruts from when we poured the shed foundation but there are ankle traps all over the yard. I’ve been doing some research and there are a few things that can cause this kind of lumpiness: Moles, Voles, and Night Crawlers.
This Article has a great description of the various rodents that can damage a lawn.

I don’t think we have any of these problems. Voles and Moles are the only ones that can burrow in the grass and make the ground lumpy. I don’t doubt we have some Voles but I think our problem has more to do with the years and years of neglect than any single pest. There were a couple holes that could be mole or vole holes and I’ll certainly be keeping an eye out for any signs of these nasty little creatures.
The descriptions of night-crawler infestations have mentioned hundreds of night-crawlers coming out when it rains. They can cause some small deflections in the surface of the lawn but nothing more than an inch and for the most part the grass is so happy to have that much worm castings that it will grow in thick and offset the lumpiness. We have lots of worms but certainly not a “moving lawn” at dusk after a rain. Sounds terrifying and I’m glad we don’t have that many worms!
After researching about various causes, I think we’ve just got a case of an abandoned lawn that has gone a bit wonky. Between letting the grass grow knee-high over and over and the snow-heave, the lumpyness is to be expected.
The strips of dead grass are where the deck wood was stored. I re-seeded those areas and they started looking much better last fall. You can see the lawn is relatively level but there are hidden dips all over!
I did a bunch of research into what can be done and I came up with a couple options.
Option 1:
Top-dress and fill in low spots with top soil and sand every spring and fall for 2 years
Option 2:
Aerate and Power rake
Option 2b:
Aerate and power rake and top-dress
Option 3:
Roller and aerate
Option 4:
Cut up sod in strips using power sod cutter, level and amend soil underneath, re-lay sod
Option 5:
pull out/kill sod, roto-til and re-sod
Neither Stefan or I are perfect-lawn people. We’re not the type to baby our yard and fret about every weed. What we would like is a safe and walk able lawn to host people on and enjoy on the weekends. It doesn’t need to be dead flat but it would nice if no-one ever twisted their ankle which I have done a couple times.
My first instinct was to wait a while and then take on the project of roto-tilling it and laying new sod. It would be a big project and possibly pricey. I don’t know what sod goes for around here. I figure 2 days of a roto-tiller rental and about 50×50 square feet of sod at $.50 sq-foot comes out to $1250 plus another $200-$300 for the roto-tiller. Pricey project.
Here’s what I’m thinking. After the first lawn mowing, we’ll see about hiring someone to power-rake and aerate. Thatch is usually tan dead-grass colored and is the under-coat of the grass. It keeps the moisture in and is generally a good thing but it does make it difficult to over-seed the lawn and too much thatch can choke out the grass. We can then get some sand and top-soil and rake that over the lawn, filling in the low spots. We’ll probably have to do that several times this year as the soil settles. We can try to tamp some of the bigger areas and then over-seed the whole lawn to encourage healthy growth.
If that doesn’t do the trick, we can spring for a more invasive and expensive solution.
What do you think? Do you have any experience in reviving a neglected lawn?
Sarah





Linda Donahue
10/18/2015 | 9:01 am Permalink
I totally disagree with the ceiling paint that goes from pink to white. First the can states dres and turns bright white in 30 minutes. After 6 hours I had pink streaks on the ceiling and instead of bright white it was dull with pinkish sheen. Hoped the next morning it would be different still had spots of pink.Returnin the can this morning and staring overwith just plain white. All my hard work gone to waste and now I have to prep ceiling all over again.Anyone else have this same experience?
John
10/22/2016 | 8:29 pm Permalink
OH yea. Lost about $1000 buying 3 gallons of this