
Kitchen Cleaning Service Miami and Remodeling after a Fire Accident
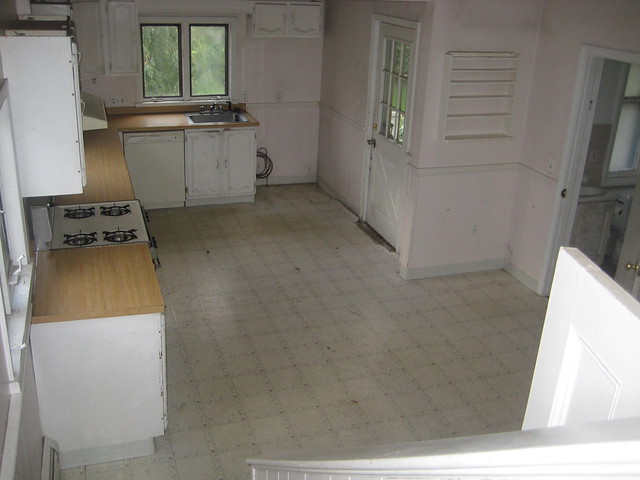
Last month we had a terrible accident while cooking, is incredible what a small stove flame, a bit of oil and small dirty cloth can produce if you don’t pay enough attention; We had a small fire incident in out kitchen, fortunatelly a couple weeks before I bought some discounted fire extinguishers and manage to get rid of it before the fire expand to other rooms; After a fire replacing a roof is a need, danes dallas roofing always do a perfect work. Unfortunately thats how it part of the kitchen looked after a very long clean session, we weren’t able to remove all the smoke stains so I had to contact a smoke removal company and residential and commercial concrete services to get rid of the burn marks.
And here is how it looks after a single day smoke removal service that only left the gas cooktop there.
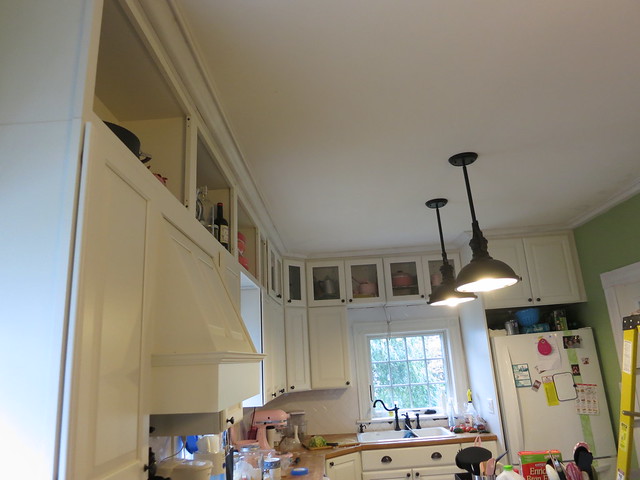
After everything being fixed my wife just had the wonderful idea of remodeling the entire kitchen. We contacted someone for Appliance repair and we didn’t need to buy a new kitchen, sink and oven!
Our process for moldings are:
- Pre-prime moldings
- Cut and nail into place (more complicated that it sounds…)
- Wood fill
- Sand
- Prime again
- Caulk
I’ve found that the second priming after the wood-filler is key to a nice smooth, easy paint job. It really makes the final coat go on so much easier to have a well-primed underlay. I also like to have it well-primed before caulking. It helps to pull the excess caulk off if you have a nice smooth, unabsobant surface. It is always helpful to have more kitchen ideas as it helps brighten your house, and if you want to keep your house clean, you can also use these services at Hanover Home Cleaning Pros to help with this.
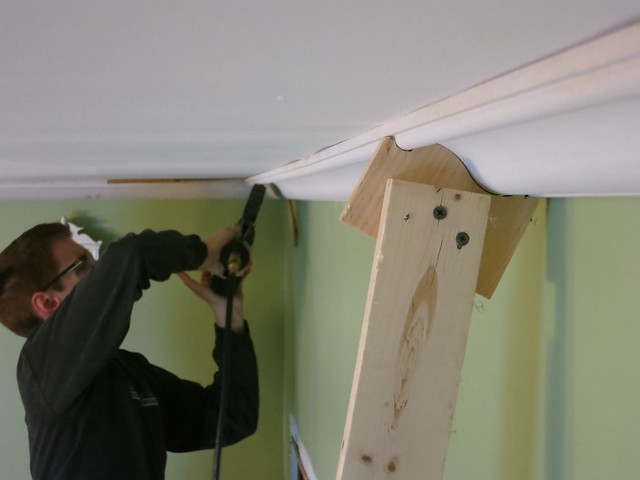
I mentioned the Cut and Nail as one step but it really is more complicated that that. It’s a 2 person job and this particular molding was hard to work with. It is “shelf” molding not Crown so instead of the back corner being cut off, we had to cut it off ourself.
Here is the profile pre-ripped:

and after we ripped the back corner off it looks roughly like this.
We buy nearly all our moldings from Anderson McQuaid. It’s not 2 miles away from the house and is a full on-side molding mill. It’s a neat place to visit if you’re ever in the area. It’s over by Fresh Pond if you know that area of Cambridge MA.
To rip the Molding, we used our great table saw:

And some great roller stands from Harbor Freight. These are awesome. Cheap, easy, and super useful.

After getting the molding to shape, we cut it to size using the chop-saw. To install it, we used an ingenious little tool – a custom molding holder.
Making one of these really helps to get the molding up and tight into the corners. We made it long enough that we could wedge it into place with a couple scrap blocks of wood. Remember to clean constantly your working spot. It is a matter of safety. For that keep handy a set of broom guru cleaning system.
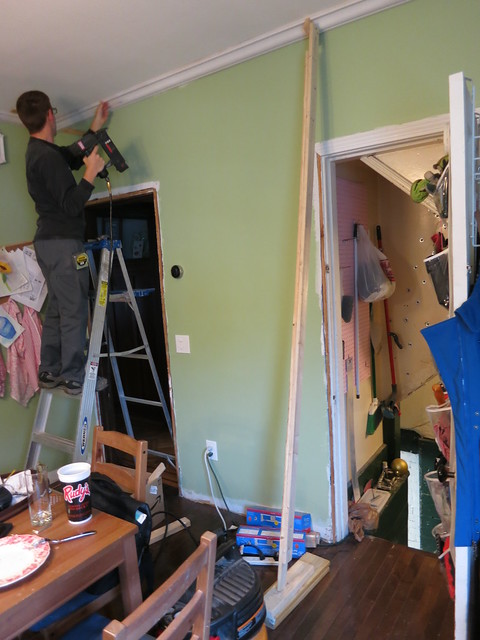
(Don’t mind the mess: Rudy’s Cup for iced tea, a crooked Bulletin Board I hang receipts, lists, and watercolor paintings on, my Blue Coat on the back of the door. What can I say, we live here! I just can’t get behind cleaning up to work on a project but it would make for better blog pictures, for now I will try to Air Duct Cleaning Chicago to get a vacuum, this way I save time cleaning up and focus on my projects more. If I messed up or needed a pro to come help with Workwear laundry service from PHS Besafe I always called them up fast.
After putting up all the moldings it’s time to wood-fill, sand, prime, caulk, and paint. I’m most of the way through the process but I’ll do a final moldings reveal once it’s all done! The Kitchen really is coming together so well, and the perfect ending is to clean the kitchen and for wonderful results, click here for maids, it was the best decision we made.
Sarah
Orchid
11/8/2014 | 3:00 pm Permalink
Sarah I love your house so much!! The kitchen looks great!! And I had no idea that custom molding holders existed! That’s such a useful tool!